In today’s digital age, product photography plays a pivotal role in showcasing your creations, whether you’re an artisan, small business owner, or just a hobbyist looking to share your work online. While professional photographers are undoubtedly skilled at capturing the essence of your products, the cost can be prohibitive for many. Fortunately, with the right techniques and a little creativity, you can achieve impressive results with DIY product photography. In this blog post, we’ll explore essential tips and creative ideas to help you excel in this endeavor.
The Importance of Great Product Photography
Before diving into the tips and ideas, it’s crucial to understand why exceptional product photography matters. Your product images are often the first point of contact between your potential customers and your creations. High-quality, well-captured photos can:
- Attract Attention: Eye-catching images grab viewers’ interest, encouraging them to explore your products further.
- Convey Quality: Clear and detailed photos suggest professionalism and attention to detail, boosting the perceived value of your items.
- Tell a Story: Through your images, you can communicate the story and essence of your brand or products, creating a deeper connection with your audience.
- Drive Sales: Compelling visuals can lead to higher conversion rates and increased sales, making them a valuable asset for your business.
Now, let’s delve into the tips and ideas for successful DIY product photography.
Tips for DIY Product Photography
1. Lighting is Key
Proper lighting is the foundation of great product photography. Natural light is your best friend, so set up your shoot near a large window or outdoors on an overcast day. Avoid harsh, direct sunlight as it can create unflattering shadows and highlights. If you’re shooting indoors, consider using softbox lights or diffusers to create a soft, even light.
2. Choose the Right Background
Selecting an appropriate background can significantly impact the overall look of your product images. Clean, plain backgrounds like white or light gray are popular choices as they draw attention to the product itself. You can use paper rolls, fabric, or foam boards for your background, ensuring it complements your product’s style.
3. Use a Tripod
To achieve sharp and steady shots, invest in a good-quality tripod. This will help eliminate the risk of camera shake and allow you to make precise adjustments to your composition.
4. Get the Composition Right
Proper composition can make your product photos more engaging and visually pleasing. Consider the following techniques:
- Rule of Thirds: Divide your frame into a 3x3 grid and place your subject along the intersections or lines for a balanced composition.
- Negative Space: Leave some space around your product to emphasize it and create a clean, minimalist look.
- Angles: Experiment with different angles (e.g., overhead, 45-degree, or eye-level shots) to find the most flattering perspective for your product.
5. Invest in a Decent Camera
While smartphones have improved significantly in terms of camera quality, using a dedicated digital camera with manual settings can provide more control over your shots. However, you can still achieve excellent results with a high-end smartphone equipped with manual shooting modes.
6. Pay Attention to Focus
Ensure your product is in sharp focus. You can use manual focus to achieve precision or tap on your smartphone screen to set the focus point. A blurry product image can turn potential customers away.
7. Experiment with Props
Props can add context and tell a story about your product. For example, if you’re selling handmade candles, include a cozy blanket and a cup of tea in the shot to create a comforting atmosphere.
8. Edit Your Photos
Editing is a crucial step in DIY product photography. Software like Adobe Lightroom, Photoshop, or free alternatives like GIMP can help you adjust exposure, color balance, and sharpness. Ensure your photos are well-edited but not over-processed; you want them to look natural and true to your product.
Creative DIY Product Photography Ideas
1. Lifestyle Shots
Consider showcasing your product in real-life situations. For example, if you sell handmade jewelry, capture an image of someone wearing your pieces in a stylish outfit. This approach helps potential customers envision how your products can fit into their lives.
2. Flat Lay Photography
Flat lay photography involves arranging your products and relevant props on a flat surface and capturing them from above. This style is popular on social media and is perfect for showcasing multiple items at once.
3. Action Shots
Capture your product in action. If you sell kitchenware, show your utensils in use during the cooking process. Action shots can convey functionality and highlight the practical benefits of your products.
4. Close-Ups and Details
Zoom in on the intricate details of your products. Whether it's the texture of a handmade scarf, the stitching on a leather bag, or the brush strokes on a painting, close-up shots can help customers appreciate the craftsmanship and quality.
5. Seasonal Themes
Tailor your product photography to different seasons and holidays. This not only keeps your content fresh but also helps customers associate your products with specific occasions. For example, you can create Halloween-themed photos for your handmade candles in October.
6. Storytelling Collages
Tell a story through a series of images. For instance, if you make custom wooden furniture, create a collage that shows the journey from selecting the raw wood to the finished piece in a customer's living room.
7. Product Bundles
If you offer product bundles or sets, showcase them together in a visually appealing arrangement. This can encourage customers to purchase multiple items at once.
DIY Product Photography Retouching
DIY product photography retouching refers to enhancing and refining your product images to make them look more appealing and professional. Whether you’re a small business owner, an artisan, or an online seller, retouching can help you present your products in the best light possible. In this guide, I’ll walk you through the essential steps and techniques for retouching your DIY product photos.
Step 1: Gather Your Tools
Before you start retouching your product photos, make sure you have the necessary tools and software:
Computer: You’ll need a computer with sufficient processing power and memory to handle image editing software.
Photo Editing Software: Use a photo editing program like Adobe Photoshop, Adobe Lightroom, GIMP (free), or other similar tools.
Original Images: Ensure you have the original, high-resolution product images that you want to retouch. Always work on copies to preserve the original files.
Graphics Tablet (Optional): A graphics tablet, like a Wacom tablet, can provide more precise control when retouching.
Step 2: Basic Image Corrections
Start by making basic adjustments to your product images:
Crop and Straighten: Use the crop tool to remove any unwanted background or empty space around your product. Ensure your product is well-centered.
Exposure and White Balance: Adjust exposure, brightness, contrast, and white balance to ensure accurate color representation and a well-exposed image.
Sharpening: Apply sharpening to enhance product details. Use a light touch to avoid oversharpening.
Step 3: Background Removal or Replacement
Depending on your preferences and the context in which you plan to use the images, you may want to remove or replace the background:
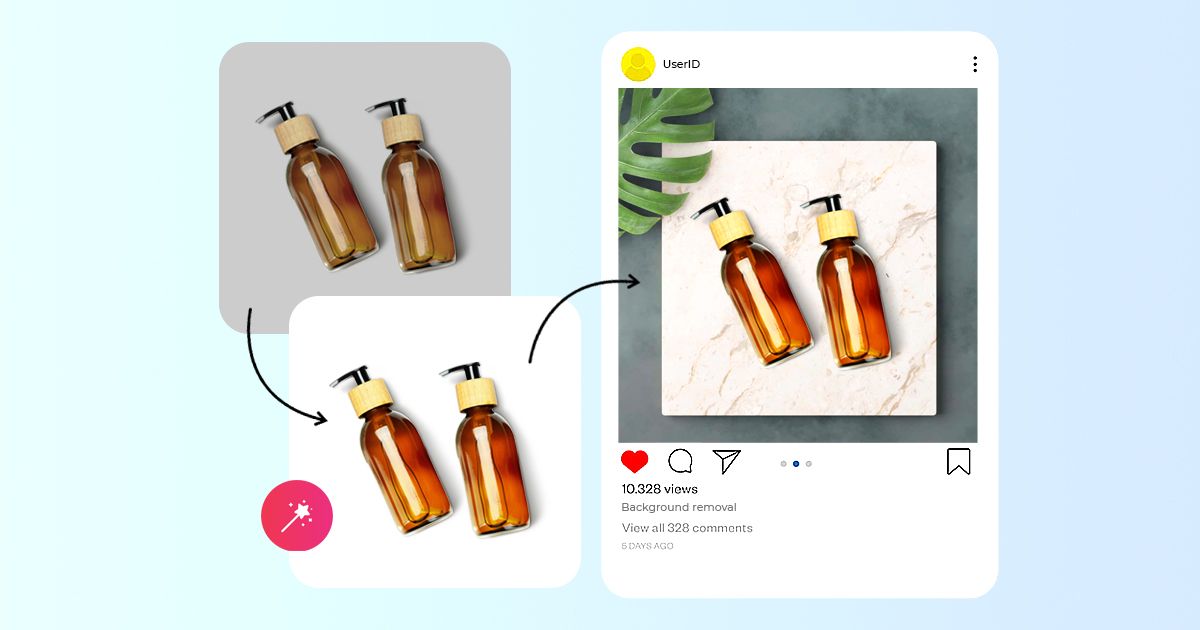
Background Removal: If you want a transparent or solid color background, use selection tools like the Magic Wand or Pen Tool to isolate your product from the background. Once selected, delete or replace the background with your desired color or pattern.
Background Replacement: If you prefer to keep a new background, import the desired background image into your editing software and position your product image over it. Adjust the product’s lighting and shadows to match the new background.

Step 4: Product Retouching
Now, focus on retouching the product itself:
**Spot Healing: ** Use the spot healing brush or clone stamp tool to remove any imperfections, dust, or scratches on the product’s surface.
Color Correction: Ensure the product’s colors are accurate. You can adjust the hue, saturation, and vibrancy to make colors pop, but be careful not to overdo it.
Texture Enhancement: If your product has texture or intricate details, enhance them using the dodge and burn tools or by applying localized adjustments to specific areas.
Remove Unwanted Shadows or Reflections: Sometimes, shadows or reflections can detract from the product’s appearance. Use the brush or clone stamp tool to remove or reduce these distractions.
Step 5: Consistency
Maintain a consistent style and look across all your product images:
Save Presets: If you’re using software like Lightroom, you can save your editing settings as presets and apply them consistently to all your product photos.
Use Templates: Create a template for your product images, ensuring they have the same dimensions, background, and positioning.
Step 6: Final Touches
Complete the retouching process with the final touches:
Resizing: Resize your images to the appropriate dimensions for your website or online marketplace. A common size is around 1200x1200 pixels for eCommerce.
File Format: Save your retouched images in the appropriate file format, usually JPEG for web use. Adjust the compression settings to balance image quality and file size.
Backup: Always keep a backup of your original product photos and the edited versions in case you need to make further adjustments in the future.
Step 7: Quality Control
Before publishing your retouched product images, carefully review them for any missed imperfections, inconsistencies, or artifacts introduced during the retouching process.
Optimizing your images for web
Optimizing your images for the web is essential for improving your website’s performance, user experience, and search engine ranking. By reducing the file size of your images without compromising quality, you can ensure faster loading times, lower bandwidth consumption, and a smoother overall browsing experience for your visitors. Here’s a step-by-step guide on how to optimize your images for the web:
Step 1: Choose the Right File Format
Selecting the appropriate file format is the first step in optimizing your images:
- JPEG (Joint Photographic Experts Group): Ideal for photographs and images with lots of colors and gradients. JPEGs use lossy compression, which reduces file size while maintaining good image quality.
- PNG (Portable Network Graphics): Suitable for images with transparency, such as logos or images with sharp edges. PNGs offer lossless compression for higher quality but larger file sizes.
- GIF (Graphics Interchange Format): Best for simple animations and images with limited colors. It uses lossless compression and is not ideal for complex images.
- WebP: A modern image format that provides good compression and quality, supported by most modern browsers. Consider using WebP if browser compatibility is not a concern.
Step 2: Resize Your Images
Before optimizing, ensure that your images are sized appropriately for your website’s layout. Avoid using images that are larger than needed, as this can result in longer loading times. Most image editing software allows you to resize images:
- Dimensions: Set the width and height of the image to match the required display size on your website. For example, if your website’s content area is 800 pixels wide, resize your images to 800 pixels wide.
- Resolution: For web use, a resolution of 72 DPI (dots per inch) is sufficient. Higher resolutions are typically reserved for print.
Step 3: Compress Your Images
Image compression is the process of reducing the file size of an image while maintaining acceptable visual quality. Here are several methods to achieve this:
Lossy Compression: JPEG is a common format that uses lossy compression. When saving as JPEG, adjust the compression level to find the right balance between file size and image quality. A lower-quality setting results in a smaller file size but may reduce image clarity.
Online Image Compressors: Various online tools and services can automatically compress your images. Examples include TinyPNG, Compressor.io, and ImageOptim. Upload your images, and these tools will optimize them for the web.
Image Editing Software: Use software like Adobe Photoshop or GIMP to manually adjust image quality settings during the save/export process. This gives you more control over the compression.
Step 4: Enable Browser Caching
Leverage browser caching to improve page load times for returning visitors. When a user visits your website, cached images can be retrieved from their device instead of re-downloading them from your server. Implementing browser caching involves configuring your web server, using caching options provided by your web hosting, or installing caching plugins if you’re using a CMS like WordPress.
Step 5: Use Responsive Images
Responsive images adapt to different screen sizes and devices, providing a better user experience. Implement responsive image techniques, such as the srcset attribute in HTML, to serve appropriately sized images based on the user’s device and viewport size.
Step 6: Optimize Image Alt Text
Don’t forget to add descriptive and concise alt text to your images. Alt text helps visually impaired users and search engines understand the content of your images. Use relevant keywords when appropriate but avoid keyword stuffing.
Step 7: Lazy Loading
Implement lazy loading for your images. This technique loads images only when they come into the user’s viewport, reducing initial page load times. Most modern content management systems and JavaScript libraries offer lazy loading plugins or features.
Step 8: Image Compression Plugins
If you’re using a CMS like WordPress, consider using image optimization plugins like Smush, EWWW Image Optimizer, or ShortPixel. These plugins automatically optimize and compress images as you upload them to your website.
Step 9: Test Page Speed
After implementing these optimizations, regularly test your website’s page speed using tools like Google PageSpeed Insights, GTmetrix, or Pingdom. These tools provide recommendations for further improvements and measure the impact of your optimizations.
By following these steps and staying committed to image optimization, you can significantly enhance your website’s performance, making it more appealing to visitors and improving your search engine rankings. A faster-loading website not only provides a better user experience but also helps retain visitors and increase conversion rates.
DIY Guide to the perfect setup for product photography
E-commerce product photography can make or break a sale.
This guide has been designed for online sellers who need product photos daily and look for scalable, budget friendly options without compromising on the quality of the imagery. The setup and equipment suggested here have proven to produce professional product photography that works while being simple.
Let’s look at the equipment you’ll need to take great product shots.
- A smartphone
- A tripod
- A white background
- A Lightbox
- White bounce cards made of foam board/paper
- A table
- Tape
- A room with a window

A Smartphone Camera
There is a good quality camera for every range, pick your budget and get it. If that is not possible, remember you live in the 21st century, where our smartphones are no less than DSLR cameras. With the right setup, even a smartphone can help you click high-quality product images. Although point and shoot cameras do a good job, the built-in lenses you get pre-installed will not be ideal when you want to conduct product photography for eCommerce.
If you want to ensure your product photos stand out, it is important that you don’t let your camera limit you. Most smartphones now come with in-built settings and features to click just the type of picture you need. Try different angles at first to get a crux of the perfect angle for your product. Any smartphone camera with a decent amount of megapixels (8MP and above) can give you wonderful results.
Tripod
Product photography is an art, and tripods are the canvas. Quality images with consistency of angle, size and perspective can help capture customer attention - leading to increased sales satisfaction.
With a tripod at hand product photography has greater control over capturing all features in detail, ensuring their photos stand out from the crowd! No longer will camera shake or blurry pictures destroy great shots; only sharpness & clarity remain for stunning imagery that truly shine!
A White Background
Ecommerce product photos for your website or marketplace listings are best shot against a clear white background. A clean, clutter free environment helps to highlight the key features of your product.
If you shoot a lot, consider buying a white sweep from Amazon. Paper sweeps are better because you can snip off the dirty bits after a photoshoot and roll out a new one.
Poster boards from drugstores or art stores are cheap. You can find something like 10-12 sheets for $10. It’s best to look for a pure white background rather than off-white or cream.
A Lightbox

Capturing product images can be tricky when dealing with intricate details, reflective surfaces, and harsh lighting conditions. To ensure you capture the best possible shot of your small items every time, a lightbox is an indispensable tool!
Not only do they provide even and controlled illumination - perfect for highlighting all those tiny features that make products so special - but many come complete with diffusers to soften shadows or create consistent backgrounds in print-materials or e-commerce websites.
White bounce cards made of foam board/Paper
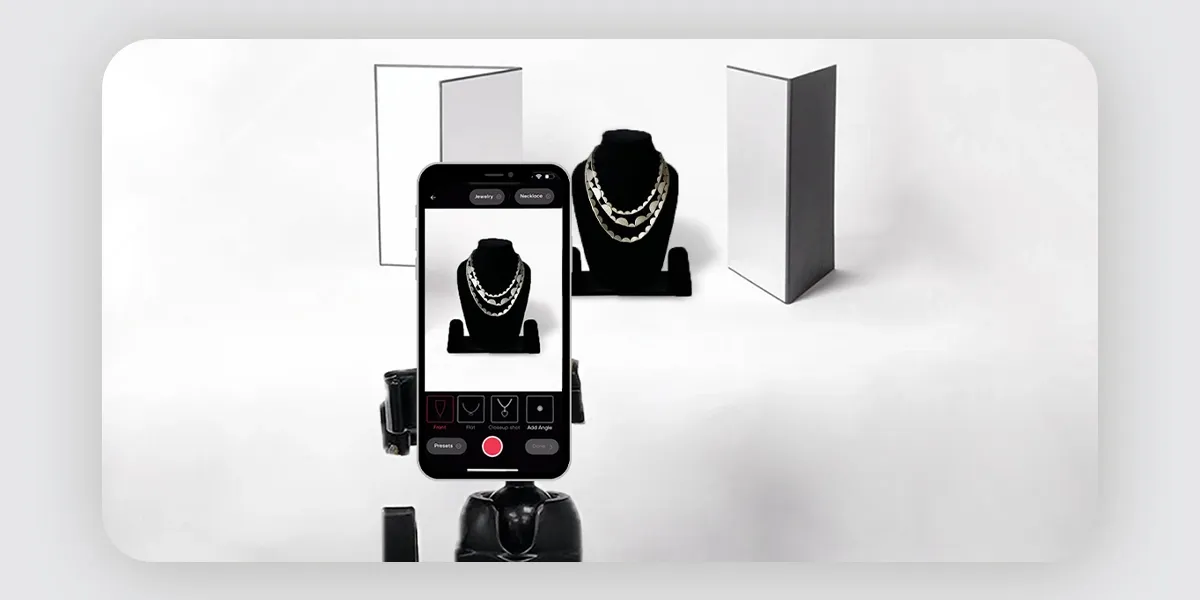
Window lights create a bright and shadow side on the products being shot. We utilize white to brighten this shadow side.
A white, sturdy foam board creates a terrific bounce card.
Black foam boards can help deepen shadows. This helps when product photography for white products on white backgrounds is being done. Adding black foam board to the sides outside the photo, behind the product, will darken the white product. For more complex lighting, use white and black bounce cards.
Amazon and drugstores sell foam boards. This is simply a white card, so you could also balance a sheet of white printer paper or poster board and use it just as easily.
A Table
A simple office or study table should do the trick for your product photography. It is good to have one that is around 27 inches wide giving you enough margin for your product placement.
Tape
Tape or clamps might secure your board so it sweeps well, depending on the table you use.
A room with a window
The more light a space has, the better. If your table is placed closer to the window, the set up produces softer light and darker, softer shadows.
Distance gives more uniform light but sharper, lighter shadows.
For product photography, it’s good to have an evenly well lit area to showcase your product photos in the best way possible.
Once the setup is all done, let’s understand the best ways to click your own product photos so they look as professional as studio shot images.
AI assistance in generating lifestyle product images
Artificial Intelligence has transformed the way online sellers craft stunning visuals to captivate their customer base. This new technology, like DALL-E, can generate life-like product images from simple text descriptions - revolutionizing how businesses market and promote items!
Not only does AI offer cost savings for merchants but automation of the image editing process also increases efficiency without compromising on quality; who wouldn’t want that?
Ultimately, with this innovative tech in hand, anyone selling products or services stands to gain a competitive edge over rivals through personalized imagery that is both unique and imaginative.
Let’s now look at how to take professional product photos on a white background. We will cover:
- Set up your table & product
- Start your smartphone photoshoot
- Decide the Angles you need
- Retouch your pictures
- Optimize images for your website

Advantages of Using AI to generate photo-realistic lifestyle product
AI is a game-changer in the world of e-commerce. Here’s why:
1. Cost-effective
Say goodbye to expensive photo shoots, models, and photographers. With AI, you can create stunning product images without breaking the bank.
2. Time-saving
No more waiting for images to be shot and edited during product photography. AI generates high-quality, retouch-free images at lightning-fast speed.
3. Consistency
Each image generated is based on predetermined rules, ensuring a cohesive look throughout your website or store.
4. Customizability
Need an image with a specific color scheme or theme? AI makes it easy to customize your product images to suit your needs.
5. Scalability
With AI, you can create an unlimited number of images to accommodate your growing e-commerce business.
6. Flexibility
Need to update product images frequently without incurring additional costs? AI is the way to go for perfect product photography.
7. Accurate representation
AI can showcase products from angles you may not have thought possible, providing a more detailed and accurate representation of the item.
8. Personalization
Tailor your images to specific customers or market segments to boost engagement and drive conversion rates.
9. Aesthetically pleasing
With AI, you can create images that are both visually appealing and on-trend, making for a more enjoyable shopping experience.
As an online seller looking to create eye-catching product images, you can turn to AI-powered image editing tools to make your life easier. Here are some examples:
1. Adobe Photoshop
You’ve probably heard of this editing software before, but did you know it uses AI-powered features like Content-Aware Fill and Pattern Preview to remove unwanted elements from images and make seamless patterns? Pretty cool, right?
2. Canva
This graphic design platform can help enhance your images with its AI-powered image enhancement tools. It automatically adjusts brightness, contrast, and color levels to make your images more visually appealing. This graphic design platform can help enhance your images with its AI-powered image enhancement tools. It automatically adjusts brightness, contrast, and color levels to make your images more visually appealing.
3. DoMyShoot
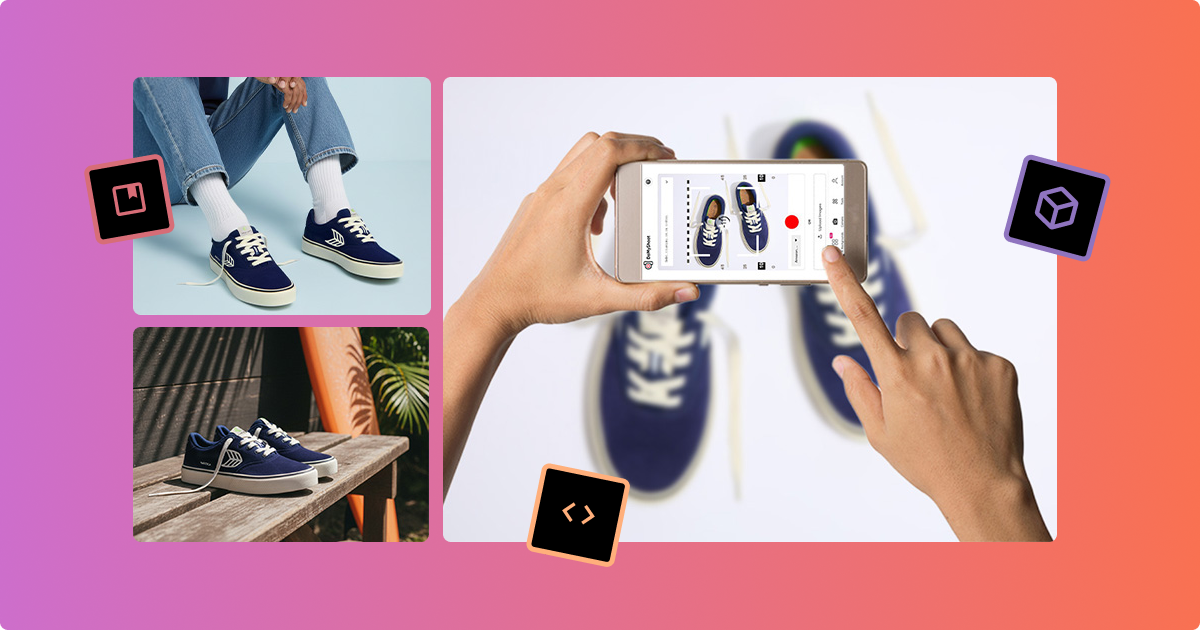
This app is perfect if you want professional-looking product photos without any experience or fancy equipment. You just use your phone to guide yourself through the photoshoot, and the AI technology takes care of the rest. It’s a great way to create custom content for your brand and upgrade your eCommerce business.
4. Remove.bg
This tool is great if you need to remove the background of an image. It uses AI to automatically isolate the product, making creating those on-trend lifestyle product images easier.
Conclusion
Gone are the days when brands had to face the laborious task of conducting traditional product photography, with its endless challenges of time and cost constraints. Thanks to the advent of AI-powered mobile app-based product photography, the process has become seamless, requiring minimal effort and producing stunning results in mere .
With the convenience of a mobile phone app like DoMyShoot, online sellers can now easily do photoshoots in any category, pick from many backgrounds, and create fresh content anytime they need. Unlike traditional product photography, where you need to fork out money for studio space, models, and props; AI-based photography incurs no extra expenses since it is entirely self-use with in-built tools.
By embracing the power of AI, these apps have revolutionized the eCommerce industry, enabling online sellers, like you, to achieve professional studio-like results without leaving their homes. The app offers endless possibilities, enabling experimentation with various product photography styles, from flat lays to furniture and lifestyle imagery.
With technology-based photography, the industry’s future is at our fingertips, and the era of sky-high expenses and long drawn planning & logistics is behind us.
Book a Demo with one of our Professional Team Members to Get Started!


